
1 / 4
| Mainboard Chip | |
| Main chipset | Intel® HM670/HM770 and other PCH |
| Audio chip | Built-in HD sound chip |
| Network card chip | Board network card chip |
| Processor Specifications | |
| CPU type | Intel i7-13700HX / i5-13600HX / i5-13500HX, etc. |
| CPU platform | Intel Raptor Lake HX 13th Gen CPU | TDP: 55W |
| Video card | Intel® UHD Graphics |
| Memory Specifications | |
| Memory type | DDR5 4800MHz / 5600MHz |
| Memory slots | 2 × DDR5 UDIMM, up to 96GB |
| Expansion Slots | |
| WiFi slot | 1 × M.2 2230 slot (support WIFI/BT) WIFI: 802.11 b/g/n/AC/AX | Bluetooth 4.0 or above |
| SSD slot | 1 × M.2 2280 slot (supports NVMe PCIe 4.0 x4) 1 × M.2 2280 slot (supports NVMe PCIe 3.0 x4) |
| PCIe card slot | 1 × M.2 2280 slot (supports NVMe PCIe 4.0 x4) 1 × M.2 2280 slot (supports NVMe PCIe 3.0 x5) |
| External Interface | |
| Power port | ATX source |
| Display interface | 2 × HDMI Out 2.0 | 1 × DP 1.4 |
| Network interface | 1 × RJ45 1000M 1 × RJ45 2500M |
| USB ports | 4 × USB 3.2 Gen1 | 2 × USB 2.0 |
| Audio interface | 1 × Line Out | 1 × Line In | 1 × MIC In |
| Built-in Plug-in Specifications | |
| Power interface | ATX power interface 24+8PIN |
| COM port | 1 × RS232 (Dupont dual-row 9-pin 2.54mm) |
| Built-in audio interface | 1 × F_Audio (Dupont dual-row 9-pin 2.54mm) |
| Plug-in socket | 4 × SATA 3.0 ports |
| TPM contact pin | 1 × dual-row 11Pin 2.0mm |
| USB 3.0 Wafer | 1 × dual-row USB 3.0 pin 20PIN 2.0mm |
| USB 2.0 plug | 2 × dual-row USB 2.0 connectors (Dupont dual-row 9-pin 2.54mm) |
| Beeper pin | 1 × SPKER 4Pin 2.54mm |
| Board-mounted pins | 1 × CPU_FAN 4PIN 2 × SYS_FAN 4PIN |
| Other Parameters | |
| Motherboard size | 225mm × 190mm |
| BIOS support | AMI UEFI BIOS, PXE, WOL |
| Work environment | Temperature: 0 ~ 40°C | Humidity: 5% ~ 95% (no condensation) |
| Storage environment | Temperature: -20 ~ 70°C | Humidity: 5% ~ 95% (no condensation) |
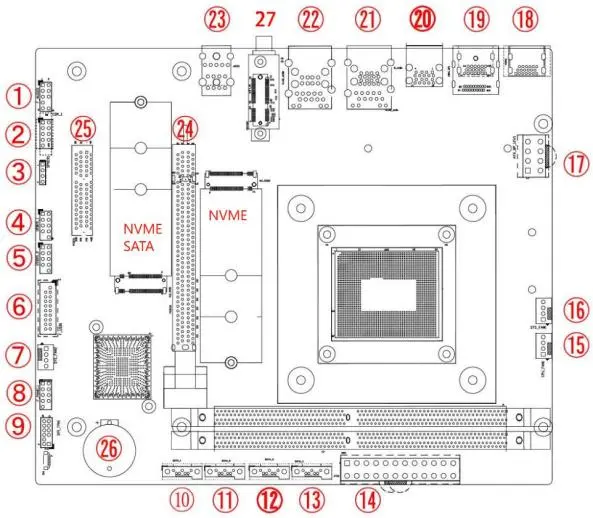
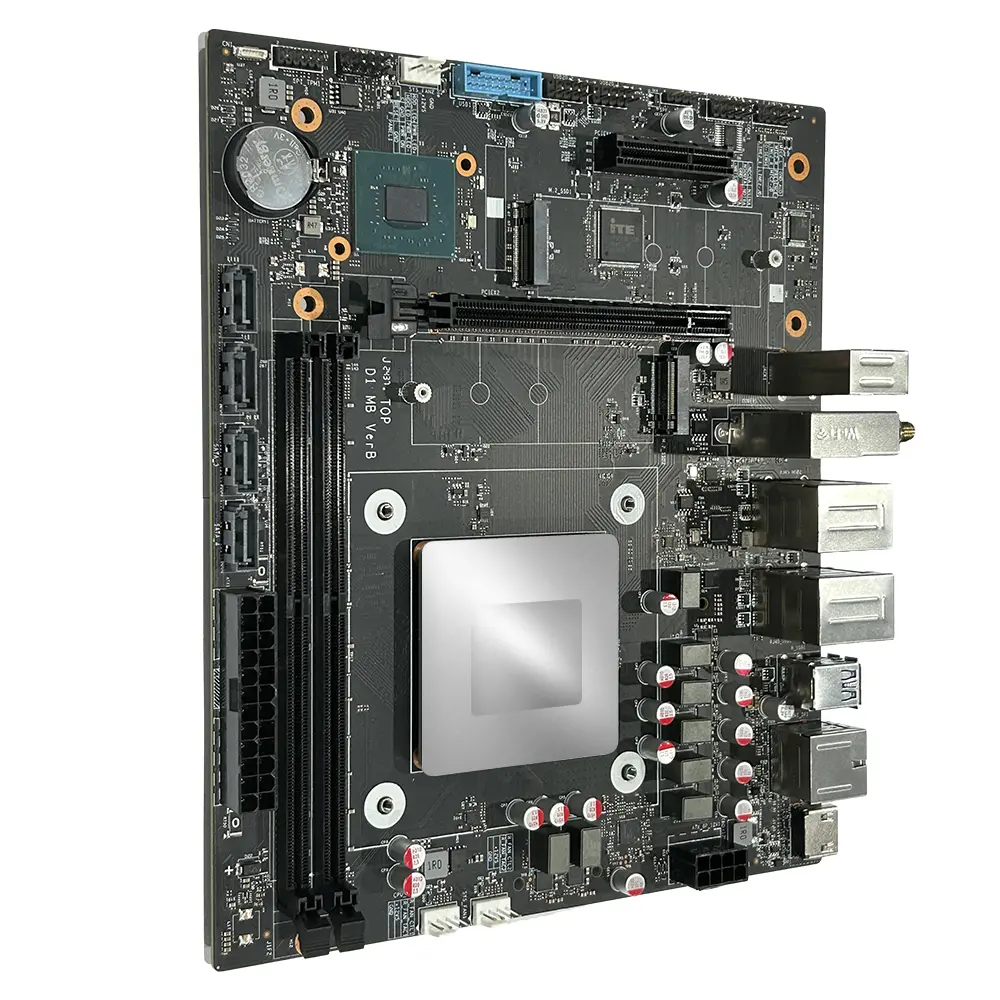
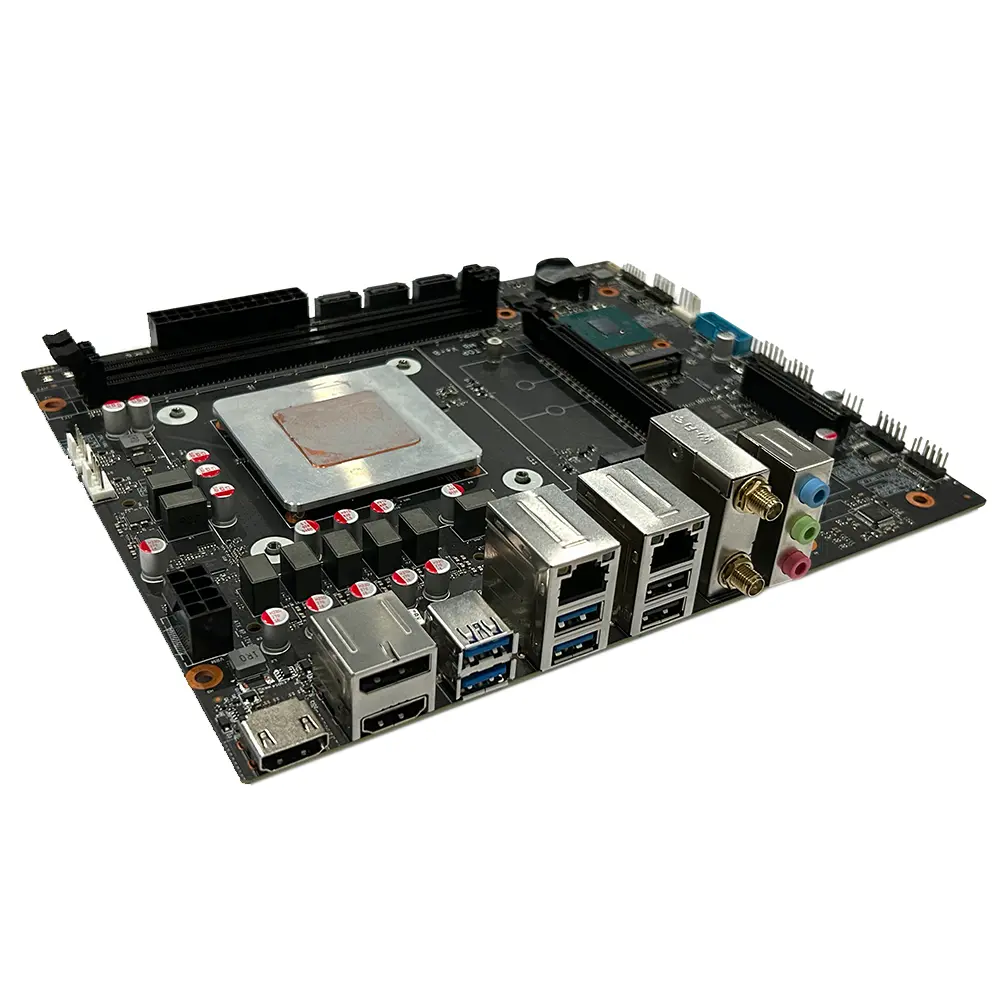
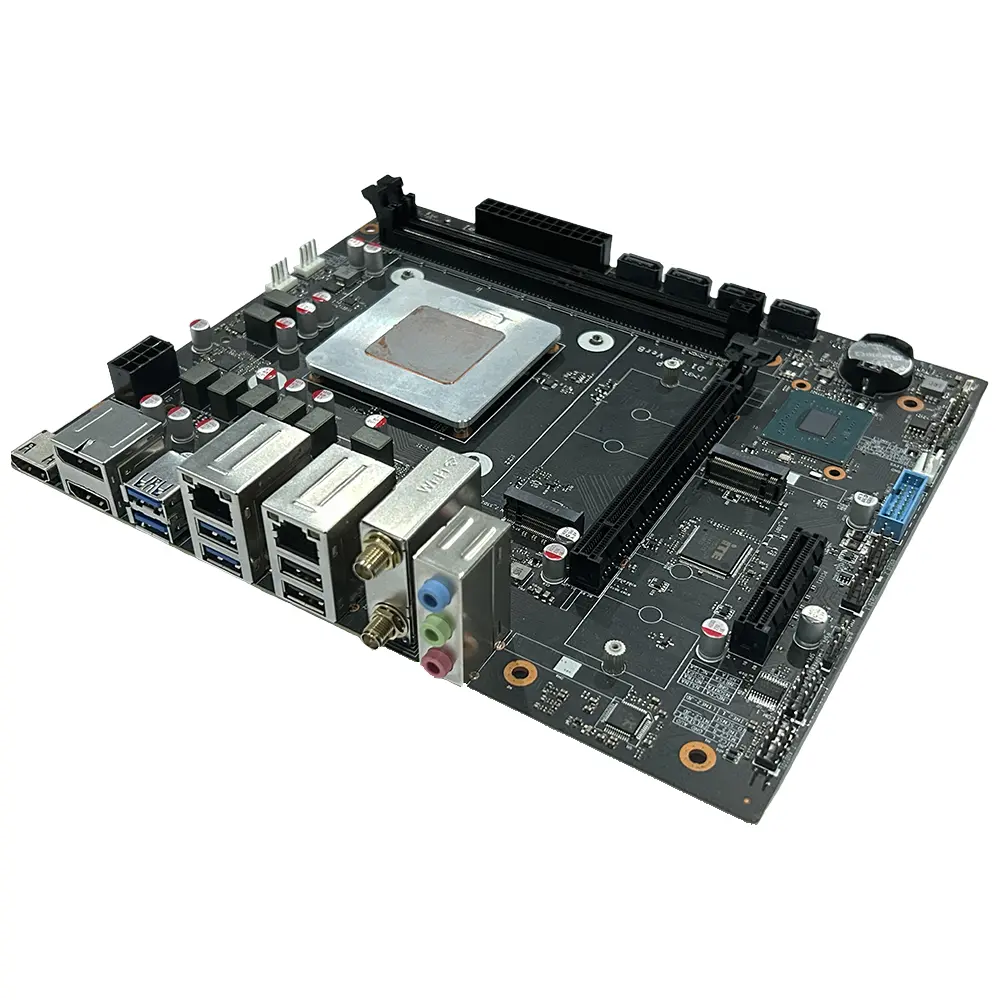
| No. | Description | No. | Description |
| 1 | F_Audio: Built-in audio interface | 15 | CPU fan interface |
| 2 | COM: Built-in serial port | 16 | SYS fan interface |
| 3 | Buzzer | 17 | ATX_8PIN 12V interface |
| 4 | USB 2.0 pin 9PIN | 18 | HDMI 2.0 port |
| 5 | USB 2.0 pin 9PIN | 19 | DP + HDMI port |
| 6 | USB 3.0 front panel interface | 20 | USB 3.0 dual-layer interface |
| 7 | SYS fan interface | 21 | RJ45 (1G) + 2 × USB 3.1 ports |
| 8 | F_Panel: Built-in switch panel interface | 22 | RJ45 (2.5G) + 2 × USB 2.0 ports |
| 9 | TPM pin 11PIN | 23 | Headset jack |
| 10 | Built-in SATA port | 24 | PCIe x16 port (optional) |
| 11 | Built-in SATA port | 25 | PCIe x4 interface (optional) |
| 12 | Built-in SATA port | 26 | RTC battery interface |
| 13 | Built-in SATA port | 27 | M.2 WIFI/BT — supports WiFi 6 |
| 14 | ATX_24Pin power interface |